Welcome!

Welcome to my blog, devoted entirely to the craft and art that is bowyering. Feel free to stay, comment, critique, and contribute to the craft.

Thursday, December 20, 2012

I said I'd have pictures...

...and I wasn't lying. It's not much, but with winter break and a new purpose for the bow, I think I'm going to make some more progress on the hickory stave. As is, this is all the progress I've made in the last month or so.
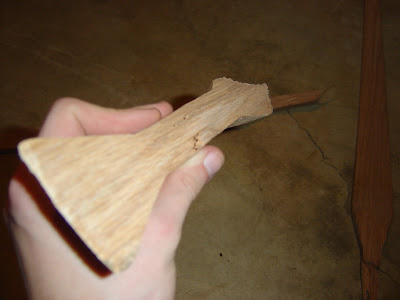
 Here's my clamp job on the riser section in the handle. You may notice that A) the riser fades are already cut and B) they're rather dark. Well, I was using my school's bandsaw and it had a rather dull blade. Like cutting clay with your thumb. However, I did get it burnt cut out, which was more than I could have hoped to do in 3 hours with my current tools.

 The glue line.

 Here is is after I cleaned up the burned wood. The wood survived, and smelled quite nice :) I love working hickory, even if it destroys tools.
 
 I apologize for the blurriness of this shot, I think I'm using a potato attempting to pass for a camera. However, you can see in the shot that I had to remove limb wood in order to get a clean fade. It doesn't matter much, I'm going to be removing a lot more very soon.

 Just displaying the marks I'll be using to narrow the riser. It's an inch and a half wide and thick here, I'm going to narrow it down to an inch wide with plenty of thickness left to mess with arrow rests and contoured grips.

A quick shot of my feet and the freshly filed nock. I'll be cleaning it up a bit, but I think I'll just shoot for pin nocks later to help with the simplicity, rather than dealing with the stress of nock overlays. It should also help the FPS, just a tad.

 It's nearly invisible to the camera, but here you can see the handle, fades, and tips. I've used the school's bandsaw with a fresh blade to help cut out the riser at this point, and using files have taken all of the edges. This is where the stave is as of today, however, with plenty of time left to work with over break, I should be able to finish by January, but if not I'll be close.

I also mentioned that the bow now has fresh purpose as well. A friend of mine stopped by the other day, and through conversation she mentioned her father had broken her longbow a few months back. I offered to make a fresh one for her, and she was pleased. She shot an old lemonwood longbow, 35 lb at 27",  so I have some stats to shoot for. Hopefully, I'll have this bow ready for her before the new year.

On another note, a friend gave me a book called the Impossible Bow, by one Nicholas Tomihama. If anybody has not read it, I'll give a brief synopsis of what it's about: making bows cheaply and safely from PVC pipe. It fits my budget and will allow me to make some bows for some family members who've been asking. It will also finally allow me to get out and shoot a little again. 

Friday, November 30, 2012

Sorry, Life's keeping me busy.

Sorry about the lack of progress, school picked up recently so I'm up to my neck in projects and assignments that warrant more attention. However, I promise my next post will have something to show.

Wednesday, November 7, 2012

An (un)astounding lack of progress

I've only made a small amount of progress on my hickory stave, cutting the end fades to the tips and the fades for the handle riser. Also very unfortunately I neglected to take any pictures. I'll update as soon as I can with actual pictures, but for now all I can give you is the promise for more.

Thursday, October 25, 2012

It was going to happen eventually

Eli Kharmarov once said "One failure is worth seven and a half successes." Well, it looks like I made seven and a half bows today then, because my first one just failed, somewhat spectacularly. I was thankfully unhurt, but rattled none the less as it very much violently imploded towards my face. Whoever said eye protection was useless has obviously never made bows. But as always, pictures:

 The three pieces created from one in about 1/10th of a second

 A slightly blurry view of the top limb's fade and glue line.

 The whole piece. Notice on the left the glue failed whereas on the right it held, instead ripping along the grain of the wood itself.

Top limb, showing the glue failure.

Bottom limb, showing where the glue held.

A different view of the glued riser. You can see the ragged edge of the bottom limb where the glue held, and the nearly straight edge where the glue failed.

Several things seem to have contributed to the failure. Obviously, I must have glued the riser improperly, as that was where the bow failed initially. Limited to that, the bow would probably have lived a long and happy life, but after I piked it to bring up the weight, the added stress was too much for the glue to handle. After 10 arrows, the riser gave way and there was a violent self-destruction within my hands. I don't plan on repeating this mistake, and using some more effective methods hope to do better than that in the future. The next one, a longer hickory self bow, will almost certainly hold up better given this learning opportunity and a much more forgiving materiel to work with. Hickory has a reputation for being incredibly strong, and more forgiving of errors so I hope to make a more durable bow.

Wednesday, October 24, 2012

PICTURES!

I love when things work out. I now have pictures of my bow and work space, and I can take more.
But for now, those pictures:
Basic info:
Red oak pyramid design, 61" nock to nock length
Pulls roughly 53 lb at 28" with about 1.5" of string follow. The low amount of set is probably because of the width, starting at 2.5" at the fades and tapering to 1/2" at the tips.
 Unsanded, unfinished bottom nock. Notice the rub off from the red bowstring.

 The riser section, back down

 Handle section, from the arrow side. You can see the black mark where the arrow rubs against the riser as it leaves the bow.

 Braced 

 A closer, if blurry, view of the braced nock. You can see the rather poorly twisted string that I'm going to have to shorten and re-twist. It was made for when the bow was about 6 inches longer. I piked the ends 2.5 inches each to bring up the weight.

A closer view of brace height, which is about 4 7/8".

Full draw, basement in the background. The arrow is a Carbon Express 3050 with a field point, 28" long.

Not much of a workstation, but it's all I've got. The table is planks on sawhorses, about 4' by 2'5". All of my tools, clamps and sandpaper, my current unfinished red oak pyramid bow, and a hickory stave that's going to be the next one. 

Side view. You can see the chair I usually clamp my staves to while I tiller.

That's the overview. I'll follow up with more pictures (and maybe video) of me shooting and I'll show where I practice. That's all I've got for now though.

Tuesday, October 23, 2012

The Bowyer's blog

I hate to start posting before I have any pictures to accompany my posts, but I don't have a camera right now to start taking photos with. However, I'll be following up with pictures of my bows as soon as I can work out a way to take the actual pictures. As is my top priorities are my education, work, girlfriend, and bowyering, in that order. Bowyering takes a back seat all of these things, but it's what drives me in my spare time, and it's all I read about at this stage. Once I can afford to devote more time I will.
Until then, may your arrows always strike true. And silently :)